The iOS 18 public beta and developer beta are now available for anyone to install on compatible iPhone models, unlocking previews of the features that will become standard on millions of phones in the fall.
Before entering the beta arena, however, it’s important to remember that these are pre-release versions of the iPhone operating system, which should give you pause. While we haven’t run into any glaring issues with the betas so far — other than realizing you can’t go back to a previous version of WatchOS on the Apple Watch — it’s always best at this point to install the iOS 18 beta on a phone that’s not yours daily device because you may encounter bugs and other software problems.
And above all, make sure that you not only have a good backup of your iPhone data, but also the right kind of backup before start the iOS 18 beta installation process. Take these steps to make sure you don’t lose any data in case you decide to go back to iOS 17 later.
And while you’re here, check out how RCS messaging works on iOS 18 and our iOS 18 beta cheat sheet.
Why iCloud Backup doesn’t work for the beta versions
You’re probably used to using iCloud Backup to keep a regular backup of your data. It runs in the background (when you’re sleeping and charging your device) and involves minimal backup friction as long as you have enough iCloud disk space available. Go to Settings > [your name] > iCloud > iCloud Backup and turn on Back up this iPhone if not already active.
However, when it comes to beta versions of iOS, iCloud Backup introduces a problem: you can’t restore from that cloud backup if you go back to iOS 17. And unfortunately, iCloud only keeps the most recent backup—you can’t choose from previous backup iterations. If you try to use iOS 18 cloud backup to restore back to iOS 17, you will get an error.
This is why you should back up your computer.
iOS warns you if you try to restore from an iCloud backup made under iOS beta.
Should you encrypt your local backup?
Before creating this archived backup, you need to decide if you want to enable one of the options, Local backup encryption. For security reasons, this feature encrypts the data to prevent someone with access to your computer from accessing it. This option also keeps confidential information in the backup, such as saved passwords and personal data in health and fitness apps.
The downside is that it requires you to create a separate password for the backup. If you forget or lose this password, the entire backup is useless. So, you should write down this password somewhere where you can easily retrieve it. In the context of creating an iOS 17 backup as a fallback to installing the iOS 18 beta, you’ll need to decide if this is an acceptable trade-off.
Create a local iPhone backup on your Mac
Creating this type of backup only requires disk space and some patience:
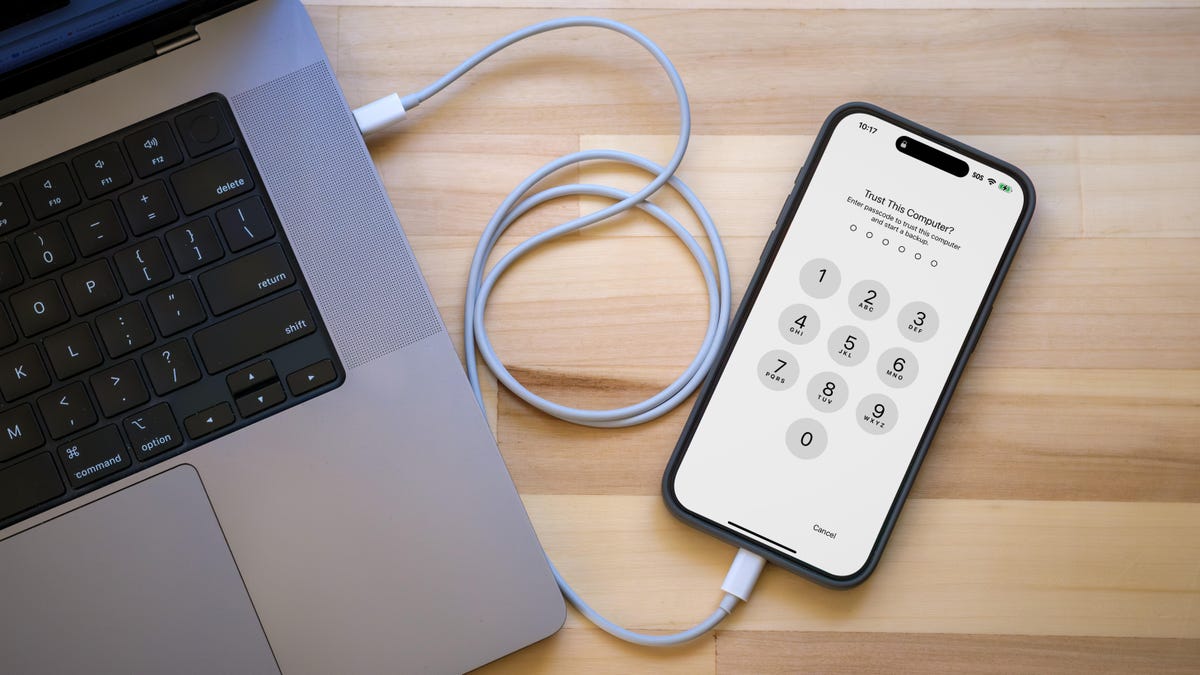
- Plug your iPhone into your Mac.
- Open a new Finder window (select File > New Finder windowor press Command-N).
- In the sidebar on the left, select your iPhone under Locations.
- If you want to encrypt the data, click Local backup encryption check box and set a password.
- On the General tab, click Backup now.
- Click Manage backups.
- Right-click (or Control-click) the backup you made and select Archive.

Back up an archive of a connected iPhone to the computer (MacOS shown here).
Taking the extra step of marking your backup as a backup protects it from being overwritten by the next local backup or automatically deleted if your Mac runs out of space.
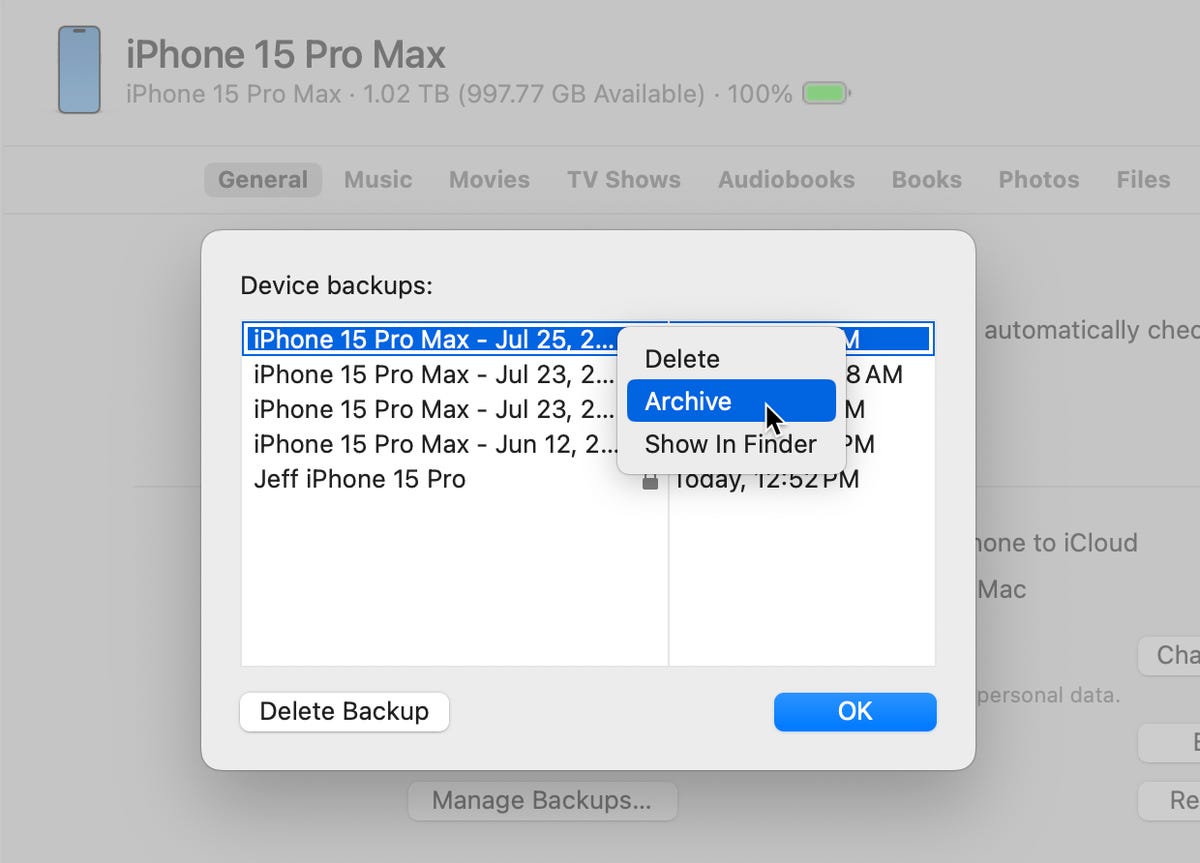
Set the backup as an archive.
Create a local iPhone backup in Windows
The iTunes app is still the primary channel for working with a connected iPhone under Windows. Open iTunes and do the following:
- Plug your iPhone into your Windows computer.
- In iTunes, click iPhone button at the top left.
- Click Summary.
- If you want to encrypt the data, click Local backup encryption option and set a password.
- Click Backup now.
- Click Manage backups.
- Right click on the backup you made and select Archive. Taking this extra step protects the backup from being overwritten by the next local backup or from being automatically deleted if there is not enough space on the computer.
With a backup, you can start using the iOS 18 beta, safe in the knowledge that if something requires a rollback to iOS 17, you can quickly get your iPhone back up and running.
The new gestures will improve the way you interact with Apple devices
See all photos